
Every icon on your Mac can be customized. It’s easy, and is an awesome way to waste an afternoon.
I reccomend you do this at work, as private time is far to valuable.
Some information you need to know:
- Apple OSX icons use a format known as .icns. We will not be using that format, but you may come across it.
- Some OSX icons will request a password before you can change them, e.g; Mail, Contacts and Calendar. Don’t change them.
Almost all the other icons on your Mac can be changed.
You can do this using standard image files that end in .jpg, .jpeg or .png.
Only use images with a resolution of 512 X 512 pixels or higher. I’ll show you how get this information in a moment.
In the example below, I’m going to create a folder for some articles on photography, then change the regular blue folder with an image of a Canon EOS camera:
- Go to the Finder and select the image you’re going to use as an icon.
- Check the image size – 512 X 512 and type – .png (portable network graphics)
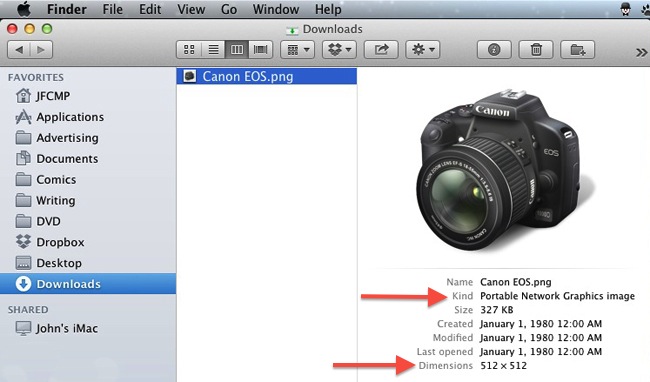
- Double click the image. It will open in Preview.
- In Preview, click anywhere on the image and press Command A to select all. The selection will be outlined by a moving dotted line.
- Now, press Command C to copy the image of the Canon EOS.
- Go to the Finder. Click on Desktop in the sidebar.
- Go to the File Menu and select New Folder.
- A new folder will appear on the Desktop. I named it Photo Articles.

- Select this folder and press Command I. An information box will open.
- Click on the small folder image at the top. When it’s selected, it will be highlighted in blue. This is the folder’s icon.
- Now, press Command V to paste the image of the Canon EOS in the icon space.
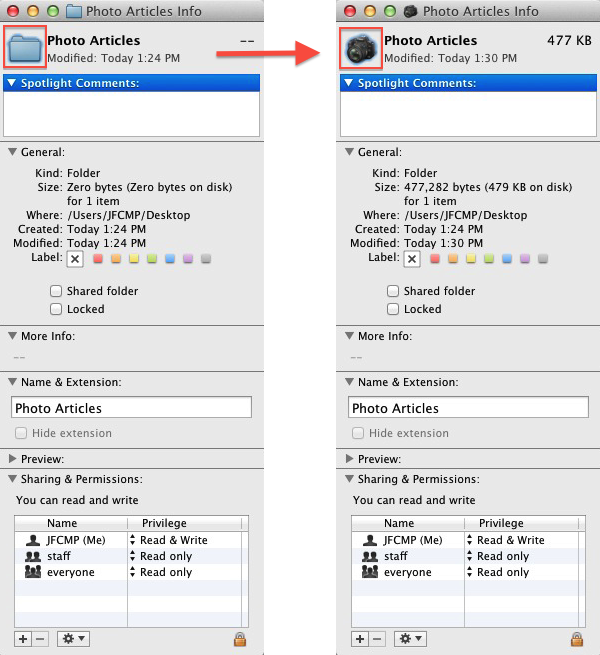
- You can now press the red cherry button to close the information window.
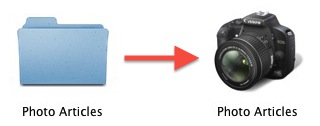
The blue folder icon has now changed into a Canon EOS icon.
If you ever want to return to the regular icon, simply open the information window, highlight the icon, and hit delete.
Have fun.
If you have questions, please use the Comments section below.

